


What to Do After a Tanning Bed? (Sunbed Aftercare Rules to Keep Your Tan Longer)
Your tanning bed session ends in minutes. The skin effects last longer. What you do...
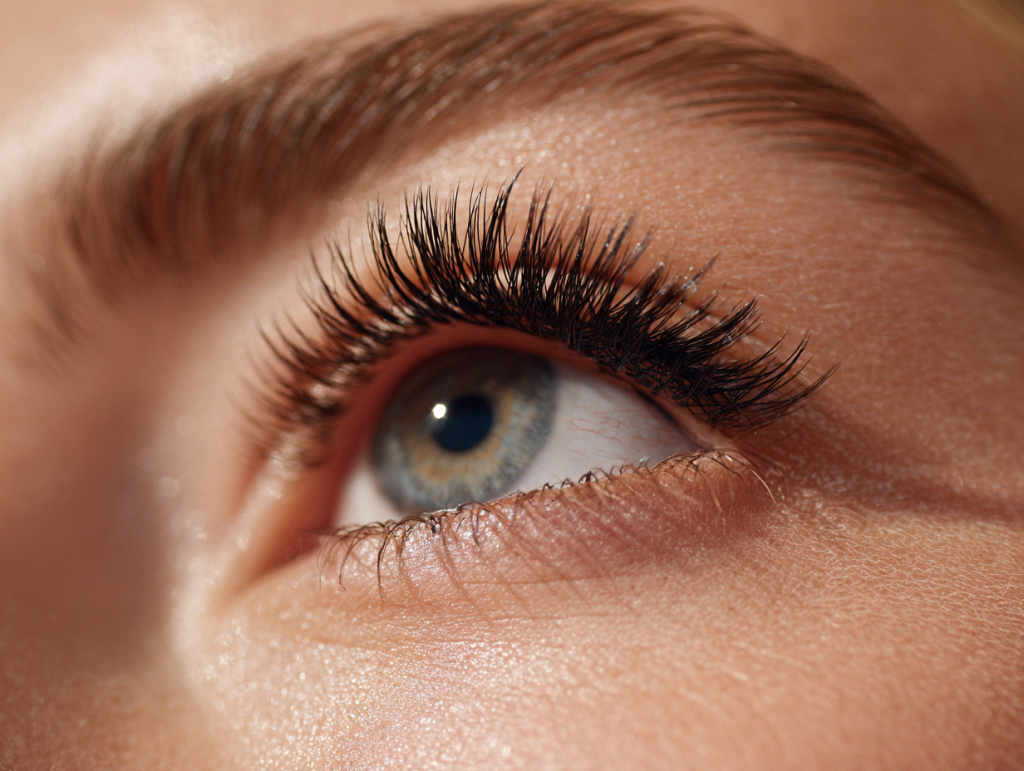
Dreaming of full, fluttery lashes without spending hours in a salon? At-home eyelash extensions have become the ultimate DIY beauty trend, giving you salon-quality results from the comfort of your mirror.
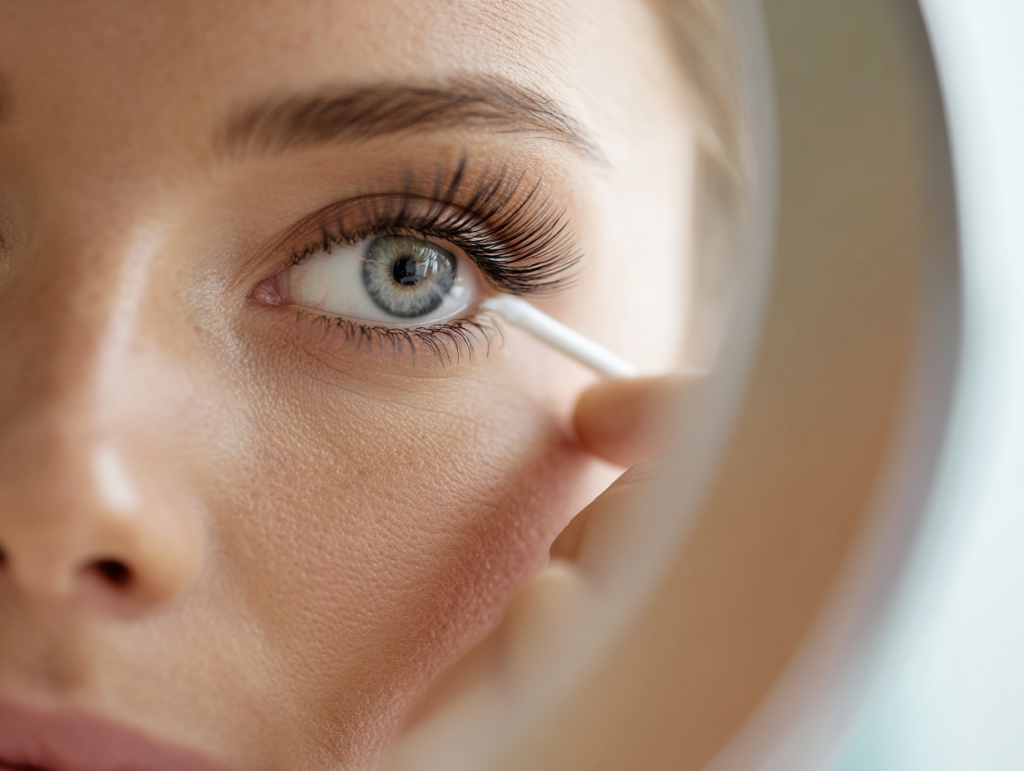
With the right at-home lash extension kit and expert guidance, you can achieve longer, fuller lashes in minutes while saving time and money. The process of eyelash extensions at Home is simple:
Using high-quality adhesive and proper techniques ensures your lashes look natural and last longer without damaging your natural lashes. With expert tips on preparation, application, and aftercare, you can enjoy beautiful, long-lasting lashes that enhance your look every day.
DIY eyelash extensions are popular because they offer flexibility, affordability, and control over your look. Professional lash appointments can be costly and require frequent touch-ups. At home, you decide when and how to apply temporary lash extensions, saving money and fitting beauty routines into your schedule.
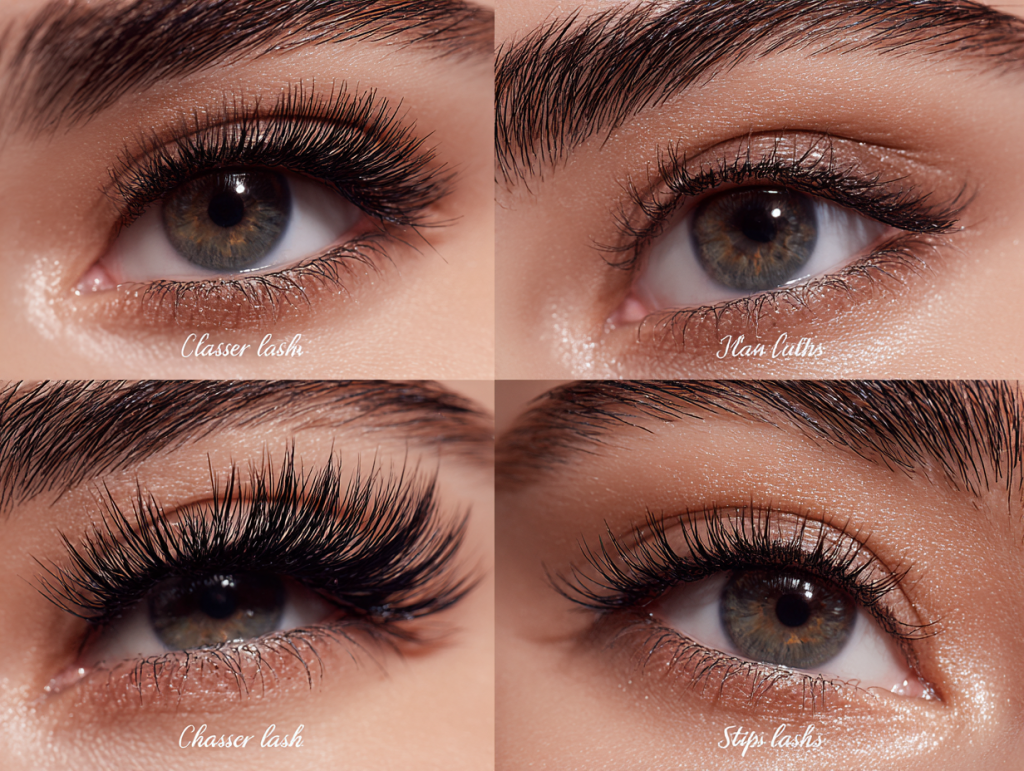
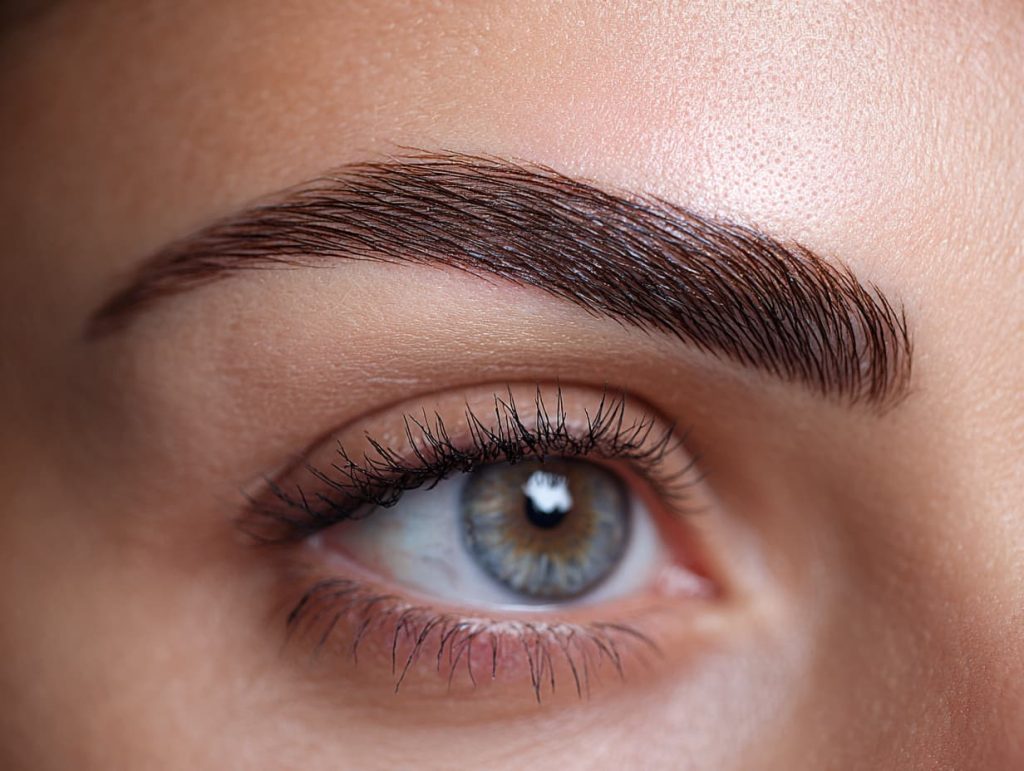
You can customize your look by choosing from cluster lashes, strip lashes, or individual extensions and materials like synthetic, mink, or silk finishes. With practice, you can create everything from a natural day look to dramatic evening volume.
| Pros | Cons |
| Cost-effective compared to salon services | Requires practice and steady hands |
| Flexible timing — apply anytime | Risk of uneven application for beginners |
| Customize style, length, and material | May cause irritation if glue or products are misused |
| No need for frequent salon appointments | Shorter lifespan compared to professional extensions |
| Privacy and comfort of doing it at home | Limited access to advanced techniques and tools |
| Easy to experiment with different looks | Potential for natural lash damage without proper care |
For many, at-home lash extensions provide a safe, convenient way to enhance their eyes, especially when you follow expert advice to avoid discomfort or damage. Curious about why do my eyelash extensions hurt or wondering is lash extension harmful? Proper kit choice and technique are key to avoiding these issues.
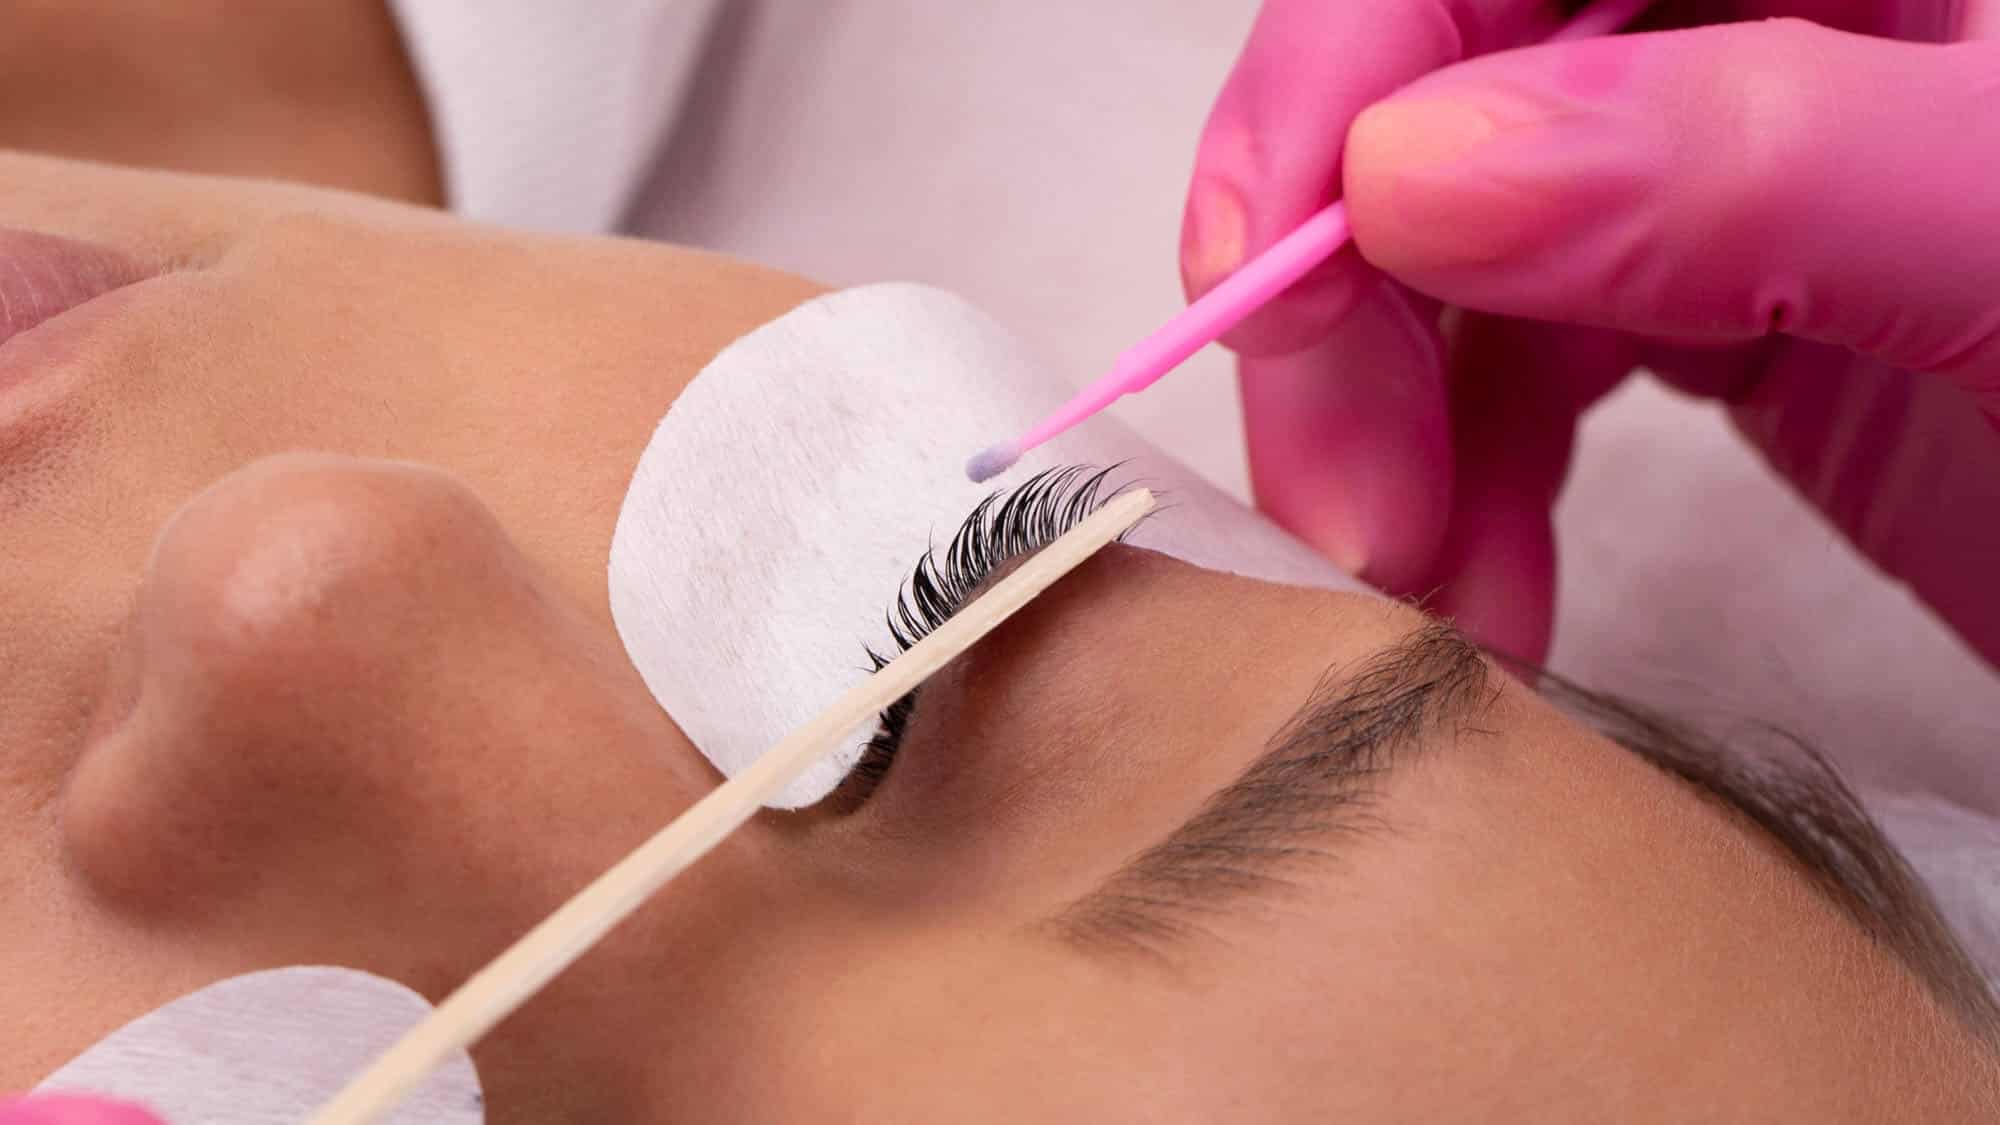
Applying DIY lash extensions at home can give you a professional, customized lash look without salon visits. With the right at-home lash extension kit and careful technique, you can achieve long-lasting, natural results. Follow these step-by-step instructions to ensure safe application and beautifully enhanced lashes every time.
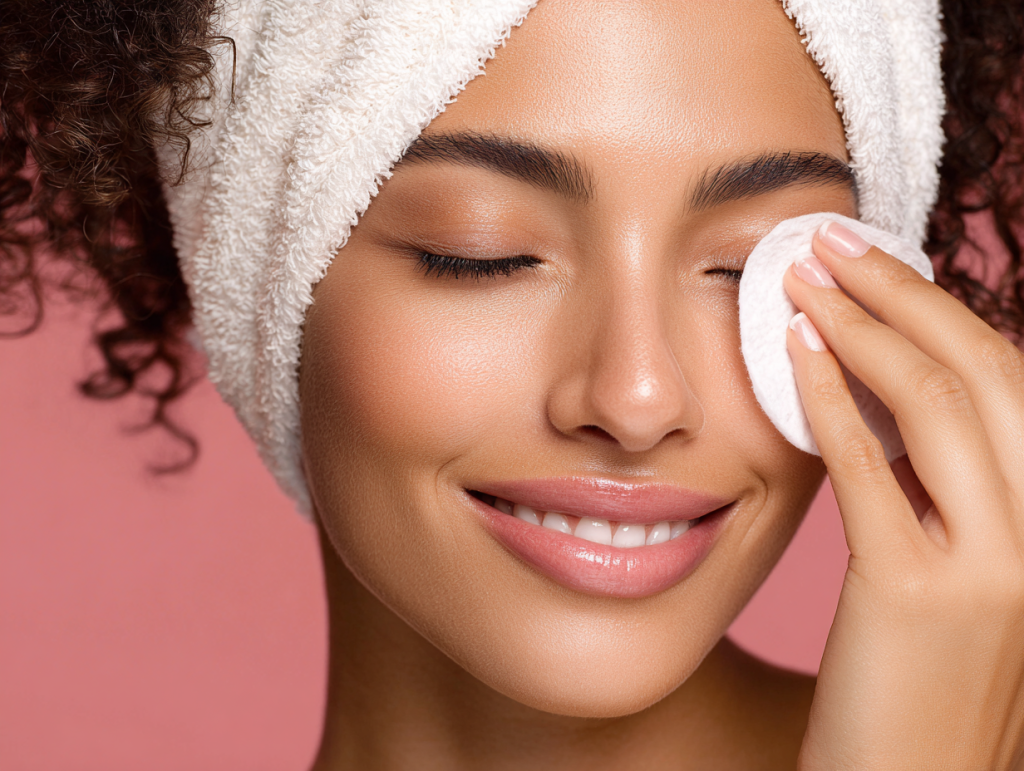
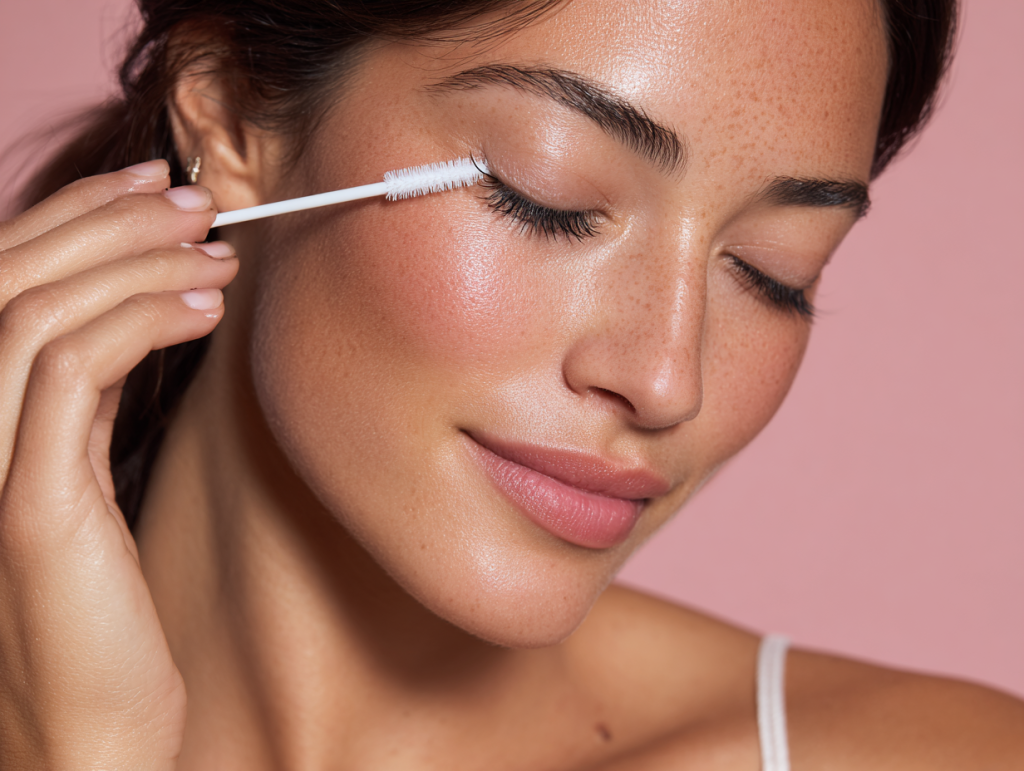
Cleanse your natural lashes with an oil-free makeup remover to remove dirt and oils. Dry thoroughly, then brush to separate lashes. Proper preparation ensures temporary lash extensions adhere correctly and last longer without clumping or falling off prematurely.
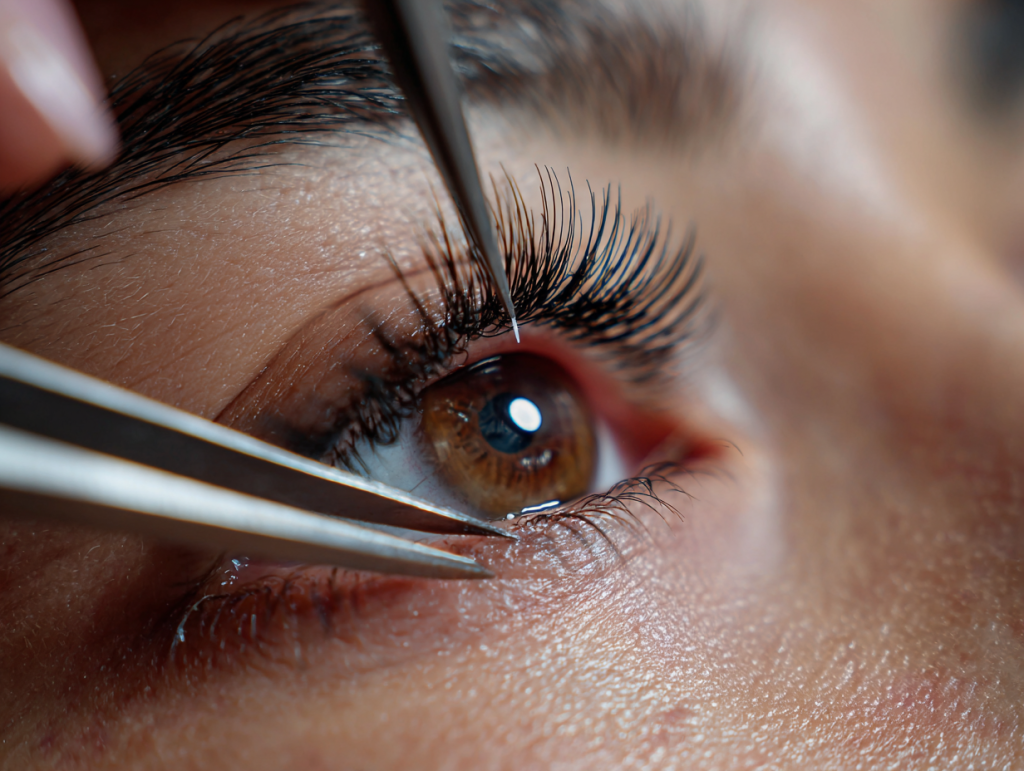
Select cluster lashes or individual lashes based on your desired volume. Use precision tweezers to isolate small sections of natural lashes for proper placement. Isolation prevents sticking and helps create a neat, professional look.
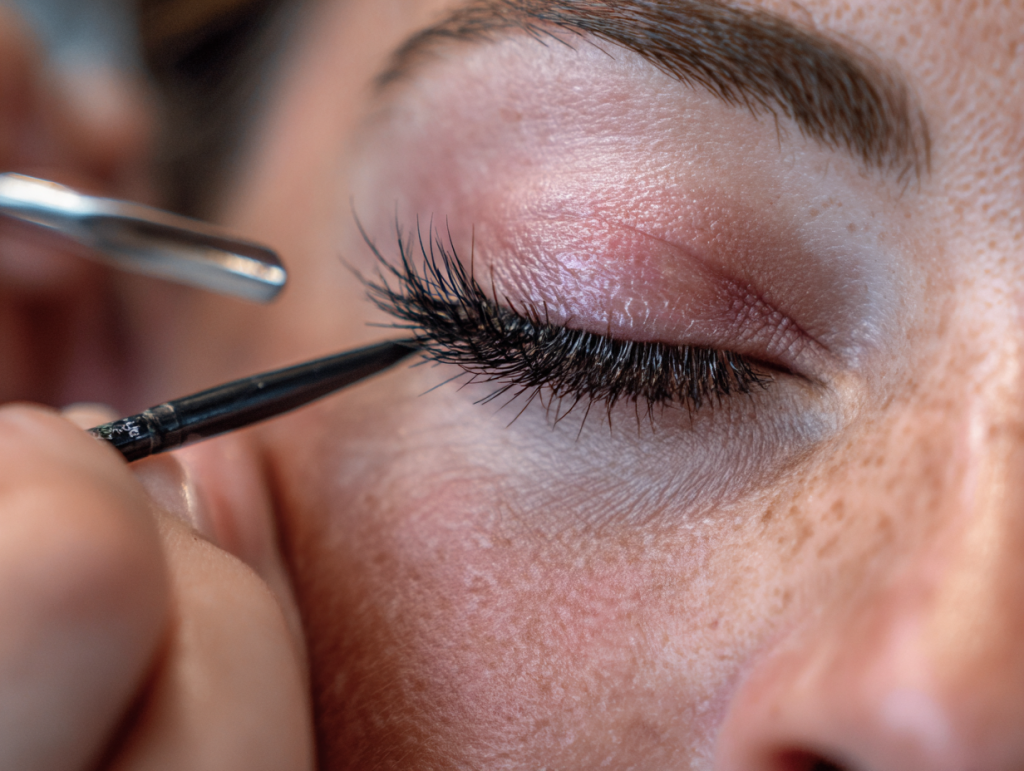
Dip the base of each lash cluster into a small amount of high-quality adhesive. Avoid excess glue to prevent clumping. Using DIY-specific lash glue ensures a secure hold while being gentle on your natural lashes, reducing damage or irritation.
Position the lash cluster slightly above the natural lash line and press gently to attach. Avoid skin contact to prevent discomfort. This placement technique creates a seamless blend, making DIY lash extensions look natural and salon-like.
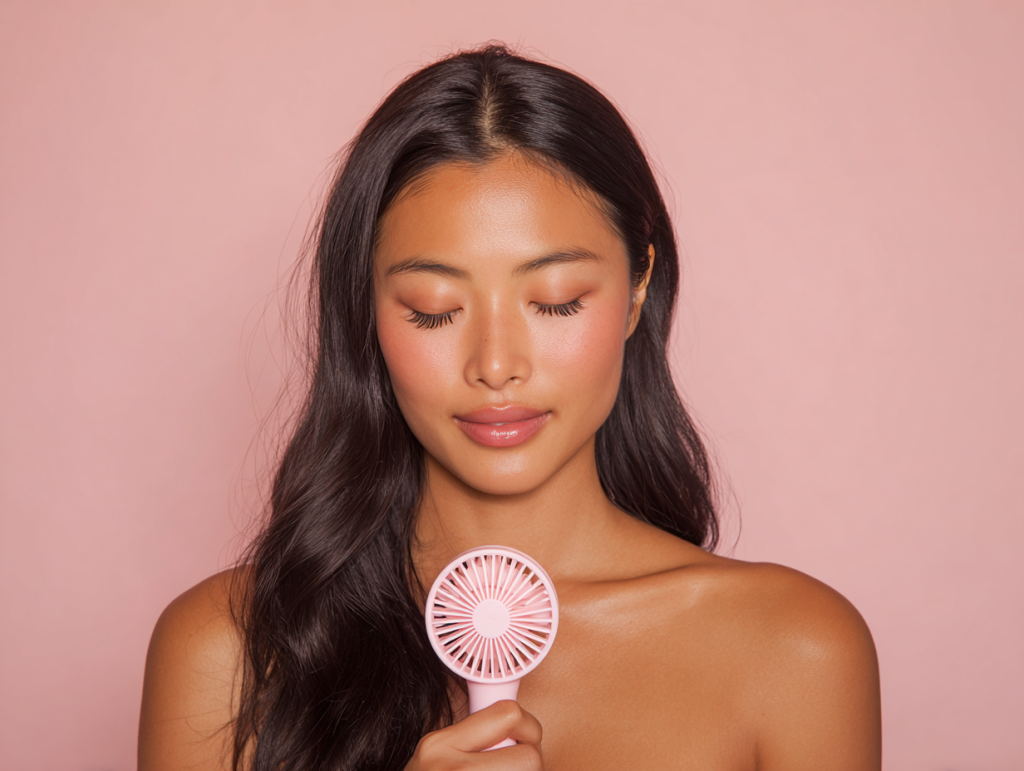
Allow the adhesive to fully dry before touching or applying makeup. Use a handheld fan or air-dry for a few minutes. Proper drying and setting help at-home lash extensions stay intact longer, maintaining curl and volume.
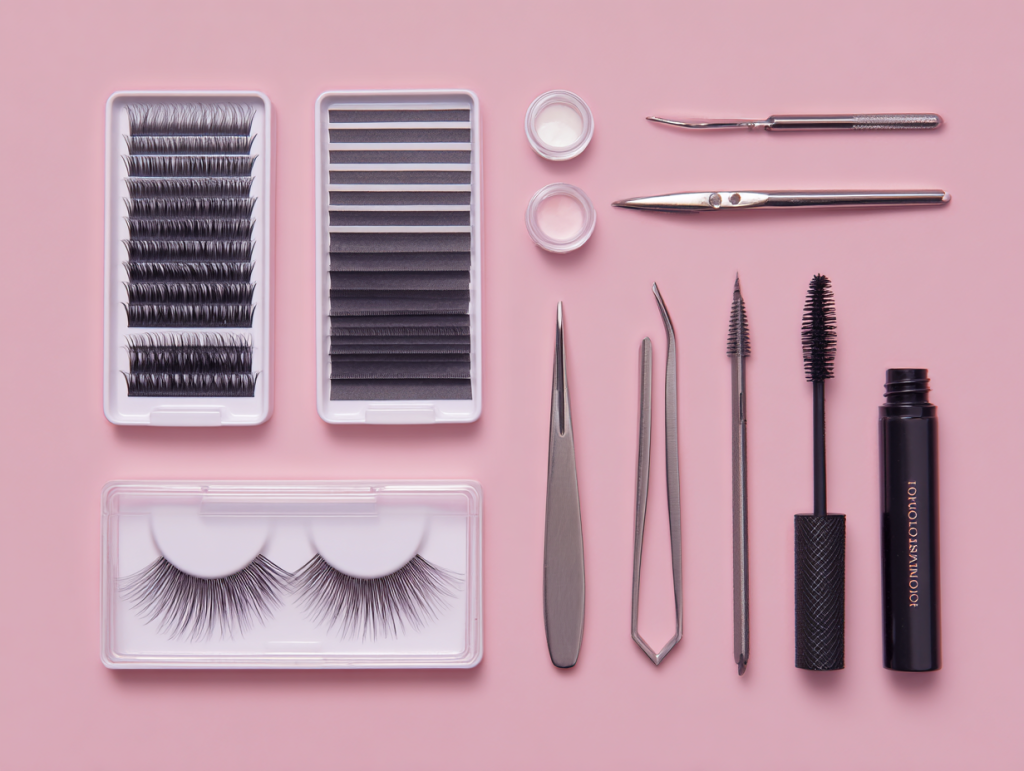
Selecting a high-quality at-home lash extension kit is crucial for great results. Here’s what to consider:
While DIY lash extensions offer convenience and savings, safety should be your top priority. Following best practices protects your natural lashes and prevents irritation or infection.
Do a patch test on your wrist or behind your ear before applying. Wait 24 hours to check for redness, itching, or swelling.
Place clusters above lash line, never touching eyelids or eyes. Use a mirror, proper lighting, and precision tools for safe control.
Select a trusted DIY kit with dermatologist-tested glue and safe synthetic lashes to prevent irritation and breakage.
Heavy clusters can strain natural lashes, causing fallout. Use lightweight extensions and even application for a healthy, voluminous look.
Looking for a flawless lash look without the DIY struggle? Experience expert lash extensions in Istanbul at Heli Beauty. Our expert lash artists create a customized, long-lasting look tailored to your eye shape and style.
Book your lash extension appointment at Heli Beauty today and experience effortless, salon-perfect lashes without the at-home guesswork.
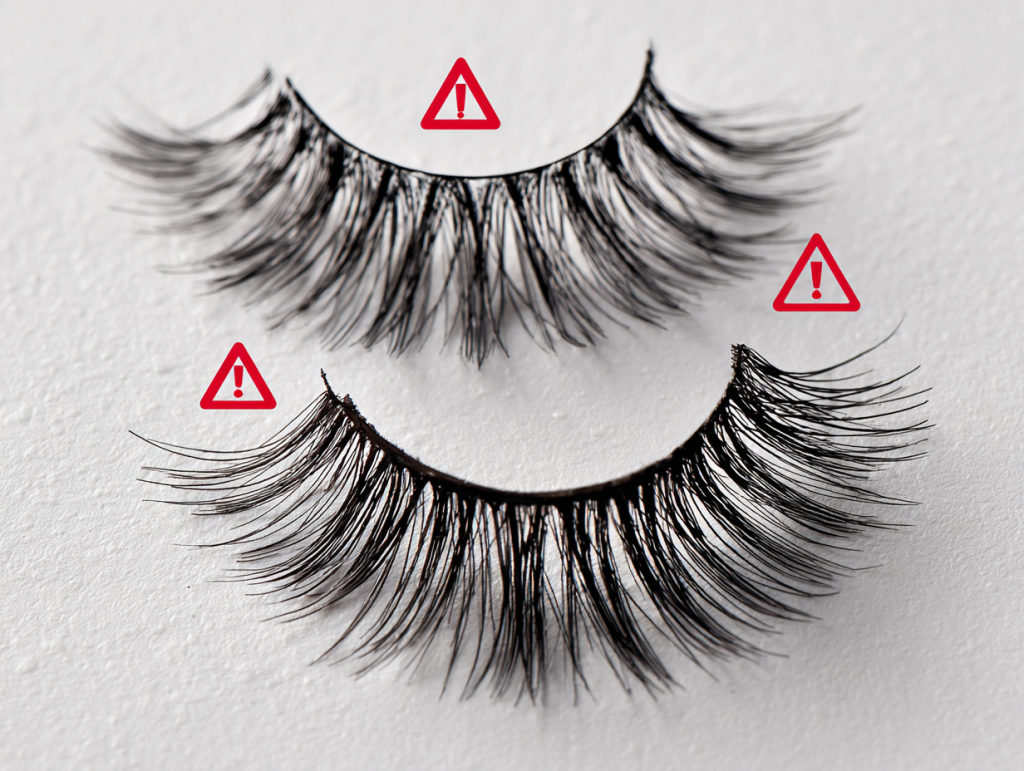
Applying eyelash extensions at home can save time and money, but small mistakes can ruin the final look or harm your natural lashes. By avoiding these common errors, you’ll achieve flawless results and make your DIY lash extensions last longer without causing damage or discomfort.
Excess glue can cause clumping, discomfort, and poor retention. For at-home lash extensions, dip only the base of each lash cluster into a minimal amount of adhesive. This ensures a secure bond without sticking multiple natural lashes together or creating a heavy, unnatural appearance.
Not cleansing your natural lashes properly leads to poor adhesion. Always clean and dry your lashes before applying DIY lash extensions. Removing oils and debris ensures the glue bonds effectively, preventing extensions from sliding off prematurely or causing uneven, messy application.
Attaching temporary lash extensions directly to the eyelid can irritate the skin and feel uncomfortable. Instead, place lashes slightly above your natural lash line to mimic professional results and allow natural movement, reducing the risk of infection or lash loss.
Incorrect placement, such as overlapping clusters, creates uneven, tangled results. When applying DIY lash extensions, isolate each section and carefully align clusters. Proper spacing avoids sticking lashes together and gives you a lightweight, natural finish that lasts longer.
To enjoy your at-home lash extensions for as long as possible, you need more than a perfect application. Proper aftercare and daily habits help maintain curl, prevent premature fallout, and keep your natural lashes healthy. Follow these expert tips to maximize the lifespan of your DIY lash extensions.
Freshly applied DIY lash extensions need time to fully cure. Exposure to water, steam, or sweat too soon can weaken the adhesive bond. Keep your lashes dry for the first 24 hours to ensure strong, long-lasting attachment and reduce the need for frequent touch-ups.
Sleeping face-down can bend or dislodge your temporary lash extensions. To maintain their shape, sleep on your back or side. Using a silk pillowcase also minimizes friction, helping your at-home lashes stay intact and looking salon-fresh for longer.
Natural oils and makeup residue can break down lash adhesive. Use a lash-safe cleanser and a soft brush to clean your DIY lash extensions. Avoid rubbing or pulling, which can damage both the extensions and your natural lashes, shortening their lifespan.
Oil-based makeup removers, eyeliners, and skincare products weaken the glue used in at-home lash extensions. Switch to water-based formulas to preserve adhesion and prevent extensions from slipping off prematurely. This small change can significantly extend your lash retention.
When enhancing your look at home, many beauty lovers debate between strip lashes and at-home lash extensions. Both options create fuller lashes, but their application method, longevity, and natural feel differ. Understanding these differences helps you choose the right approach for your needs and skill level.
| Aspect | Strip Lashes | At-Home Lash Extensions |
| Application | Pre-made lash bands with temporary glue | Applying clusters or individual lashes directly to natural lashes |
| Skill Level | Easy, beginner-friendly | Requires more skill and technique |
| Longevity | Lasts for one day | Lasts up to two weeks |
| Look & Feel | Instant glam, less natural feel | More natural, fluttery finish |
| Reuse | Reusable but temporary | Semi-permanent solution |
| Best For | Quick, temporary glam for events | Everyday wear with longer retention |
| Pros | Easy to apply and remove | Long-lasting, salon-like results |
| Cons | Less natural, short duration | More time-consuming, needs practice |
Strip lashes are pre-made lash bands applied with temporary glue. They’re ideal for beginners seeking instant results without commitment. While they’re reusable and easy to remove, they don’t last beyond a day and may feel less natural compared to DIY lash extensions.
Unlike strips, eyelash extensions at home involve applying clusters or individual lashes directly to your natural ones. With proper technique, they last up to two weeks, offering a semi-permanent solution with a more natural, fluttery look. They require more skill but provide better durability.
If you want fast, temporary glam for events, strip lashes are perfect. For everyday wear and longer retention, DIY lash extensions offer a salon-like finish without frequent reapplication. Your choice depends on time, comfort, and how long you want your lashes to last.
Yes, at-home lash extensions are generally safe when applied correctly using high-quality products. It’s essential to follow instructions, use a safe adhesive designed for DIY use, and avoid contact with your eyes. Beginners should start with temporary lash extensions or clusters for easier, safer application.
Applying cluster lashes is easier than you think. Here’s how to apply cluster lashes: start by choosing the right cluster size, dip the base in lash glue, and gently place it under your natural lashes for a seamless look. Many DIY lash extension kits include cluster options for beginners.
DIY lash extensions can last anywhere from a few days to up to two weeks, depending on the quality of the kit, adhesive, and aftercare. Proper cleaning, avoiding oil-based products, and gentle handling help maximize the retention of your at-home lash extensions.
To apply eyelash extensions at home, you’ll need an at-home lash extension kit, which typically includes lash clusters or individuals, lash tweezers, adhesive, a lash applicator, and sometimes a sealant. Having a magnifying mirror and good lighting makes the DIY process safer and more precise.
Improper use of DIY lash extensions can lead to lash breakage or loss. To protect your natural lashes, avoid applying extensions that are too heavy, never pull them off, and use a gentle adhesive remover. With proper technique, at-home lash extensions do not harm natural lashes.


Time for a Self Love Appointment!
Elevate Your Look with Our Luxurious Services